Would you like to do your eyelash perm at home? This technique gives your natural lashes an incredible curl to look much curlier and perfect when applying mascara. To do it, it is necessary that you first inform yourself about the required products and materials and know what all the steps are to follow so that the final result is as expected. Professionals in the sector should carry out this type of treatment, but if you want to try doing it yourself, keep reading this article in which we show you how to do an eyelash perm at home step by step.
Table of Contents
Steps to follow:
Step 1
The eyelash perm is a treatment that curls the natural eyelashes and makes them have a more pronounced curvature, which will undoubtedly enhance the expressiveness of your look and give your eyes a much more impressive image. You can also enhance your eye shape further using tools like eyelid strips — check this detailed guide to understand how they complement lash treatments.With this technique’s curl, you will not have to use the eyelash curler before applying the mascara since they will already be perfectly curved.
The treatment is carried out quickly and easily, it usually lasts approximately 60 minutes, and the results observe immediately. The eyelashes will remain curled for about three months, after which they will return to their natural state. Its price is variable since it will depend on the beauty centre where you perform the treatment, but it is usually around 25 euros.
The eye area is extremely sensitive. If you have allergies, eye infections, or very sensitive skin, consult a professional before attempting an eyelash perm at home.
Eye specialists warn that chemical products used near the eyes must be handled carefully to prevent irritation or injury, according to the American Academy of Ophthalmology.
Difference Between Eyelash Perm & Lash Lift
| Feature | Eyelash Perm | Lash Lift |
|---|---|---|
| Curl Style | Tight curl | Natural lift |
| Look | Dramatic | Soft & natural |
| Duration | 6–12 weeks | 6–8 weeks |
| Maintenance | Low | Low |
| Popularity | Traditional | Trending |
Trend Comparison (% Popularity)
| Treatment | Popularity Trend |
|---|---|
| Lash Lift | 65% |
| Eyelash Perm | 35% |
Lash lifts are currently more popular due to a natural look.
Benefits of Eyelash Perm
- Enhances Eye Appearance
- Reduces Need For Eyelash Curler
- Saves Makeup Time
- Lasts Up To 3 Months
- Suitable For Straight Lashes
Step 2
It is best to go to an expert beauty centre not to damage the natural eyelashes, especially if we do not have experience carrying out this type of treatment. Now, if you want to do the eyelash perm at home or know someone who can help you do it from the comfort of your home, you must take into account a series of factors beforehand.
We start with the materials you need; you must purchase a kit to do the eyelash perm for sale in professional cosmetics stores. This kit should contain the following:
1.Permanent glue.
2.Perm gel.
3.Liquid neutralizer.
4.Rollers or curlers.
5.Brush-comb for eyelashes.
6.Orange stick.
Keep in mind that the eyes are very delicate and sensitive, so even if the products are unique for the eye area, you must prevent them from entering them, as they could cause slight itchiness and redness.
Who Should Avoid Eyelash Perm
Avoid if you have:
- Eye Infections
- Recent Eye Surgery
- Extremely Sensitive Skin
- Eyelash Thinning Or Loss
- Allergies To Beauty Adhesives
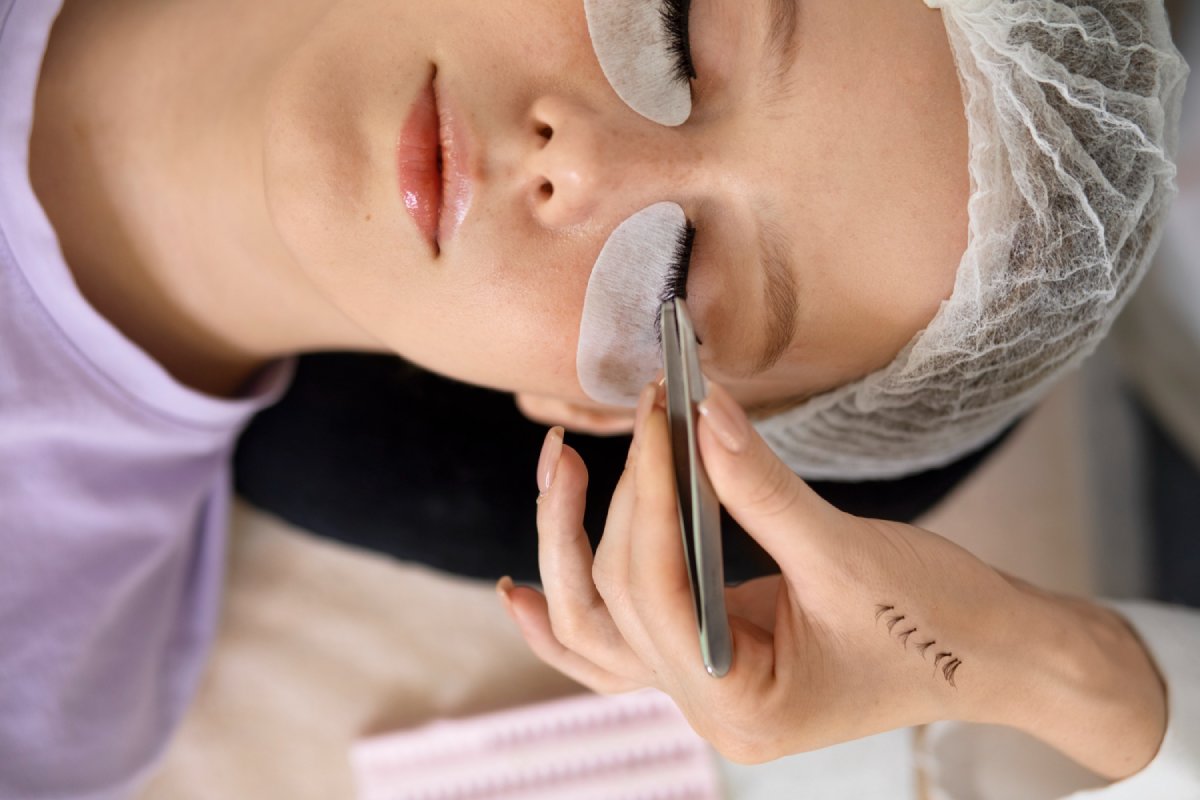
Step 3
Before starting the procedure, you must clean your eyes and remove any traces of makeup from them. It is best to use a biphasic eye makeup remover to do this. When combining an oily base with a watery one, it is a product that cleanses in-depth, ending even the most resistant makeup as waterproof or water-resistant.
Don’t miss the recipes in the article How to make a biphasic eye makeup remover if you want to make your cleansing lotion.
Purple eyeshadow can instantly enhance your eye makeup when combined with the right techniques and tools.
Step 4
Once the eyes are immaculate, it is time to start doing the eyelash perm. You must carry out all the steps we list below, respect the order we show, and do not skip any if you want to obtain good results and dazzle with heart-stopping eyelashes.
Apply a line of the glue in the kit just above the upper lashes, as close to the hair root as possible.
Using your fingers, shape the curler or roller into a slight curve and place it over the glue line you just applied.
Reapply a little more glue now on the curler
With the orange stick, stick the hair of the eyelashes to the curler, following order and placing them well. The tabs mustn’t be piled up or very close to each other; since they glue, they will remain at the end of the procedure.
With the help of the orange stick, apply a little perm gel to all the hairs on the eyelashes.
Cover the eye area with plastic wrap and put a towel on it. Wait about 15 minutes.
After that time, apply a drop of the liquid neutralizer to the eyelashes.
Cover the area with the plastic wrap and towel again and let it sit for 15 minutes.
Once the time has gone, you must remove both the curler and the product with a cotton pad soaked with water.
With all these steps, you will have your eyelash perm done, and your eyes will look much more impressive.
Step 5
After doing the eyelash perm, it is normal for you to have some questions: can I apply makeup usually? Well, we can use the mascara just like you did before.
Of course, we recommend that you do not put makeup on them right after the treatment is over and, above all, that you do not clean or rub them after curling, as you could considerably reduce the duration of the perm. When you remove eyelashes, you must do it carefully. Use a cotton pad moistened with a makeup remover and pass it gently over the eyes without pressing or dragging the product.
Possible Side Effects
- Mild Irritation
- Redness
- Dryness
- Brittle Lashes (Rare)
If irritation continues, consult a dermatologist.
Aftercare Tips
- Avoid Water For 24 Hours
- Avoid Rubbing Eyes
- Avoid Oil-Based Removers First 48 Hours
- Brush Lashes Daily
- Apply Lash Serum For Strength
Step 6
And if you still do not dare to do the eyelash perm at home, but you want to show off much more curly eyelashes, nothing better than starting to do some of the tricks that we reveal below; you will be able to give them a greater curvature and, in a completely natural way. :
Wet a metal spoon with hot water. Once it is desirable but not burning, place the back of the scoop on the mobile eyelid right at the root of the upper lashes. Keep the spoon in this position, and with your thumb, press the hairs against the scoop as if you want to adhere them to it.
Natural Curl Methods Comparison
| Method | Result | Duration |
|---|---|---|
| Warm spoon | mild curl | 1 day |
| Aloe vera gel | natural lift | few hours |
| Vaseline | conditioning | improves over time |
| Mascara zig-zag | instant curl | 1 day |
FAQ
How long does an eyelash perm last?
Results usually last 6–12 weeks depending on lash growth.
Is eyelash perm safe at home?
Yes, if done carefully using a quality kit and following instructions.
Can I wear mascara after eyelash perm?
Yes, but wait at least 24 hours.
What is better: lash lift or perm?
Lash lift gives a natural look, while perm gives dramatic curl.
Does eyelash perm damage lashes?
When done properly, it is safe and does not damage lashes.